
This post may contain affiliate links. Please read our disclosure policy.
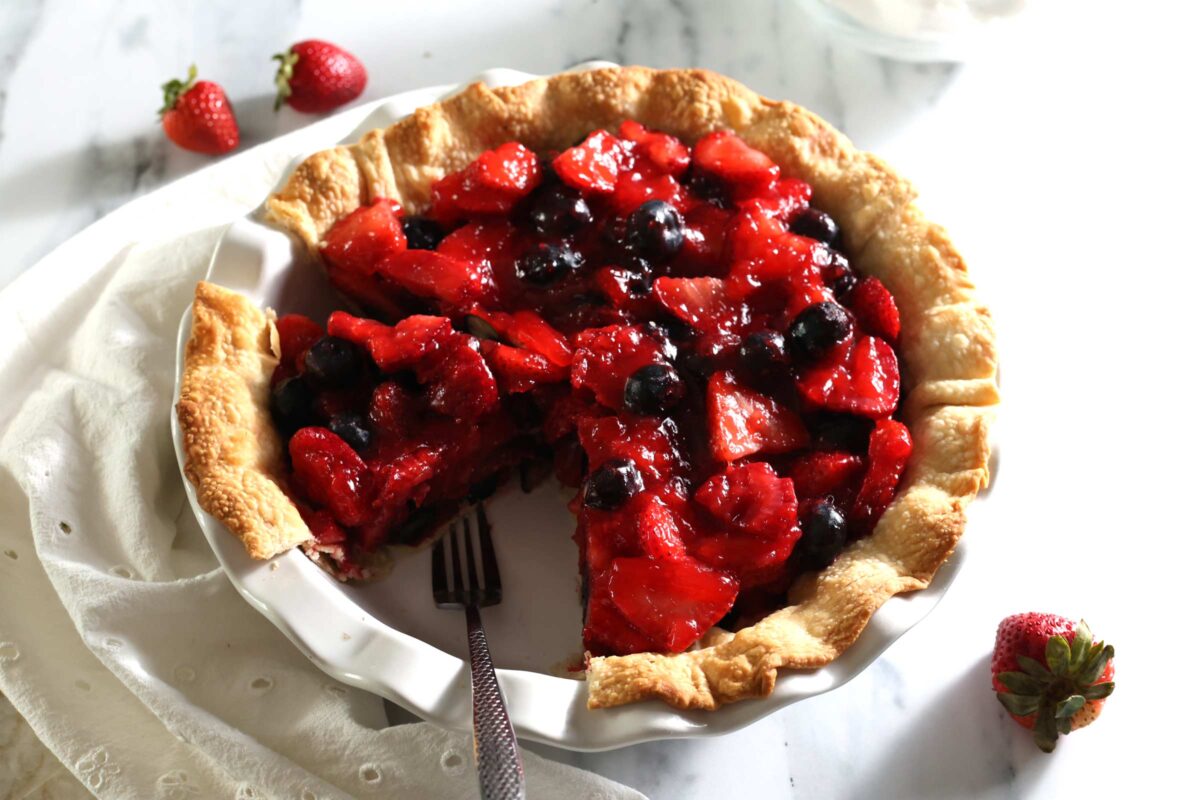
This fresh strawberry and blueberry pie is everything I love about summer in one slice! A quick stovetop filling, a big pile of ripe berries, a cloud of whipped topping, and zero stress. My mom has made it for our family for years, and it vanishes every single time.
When Strawberries Meet Blueberries… Summer Just Shows Up.

My mom has been making this strawberry and blueberry pie for our family for as long as I can remember. Decades, honestly! It’s the one that turns up the second the weather warms up, when everybody ends up crowded in the kitchen and somehow there’s never a slice left by the end of the night.
It’s hers, through and through. I learned it right beside her in the kitchen, the way the best recipes get passed down, and just about everything I know about getting it right, I know because she showed me. Even the little touches that make it special are all hers, a splash more water for a softer set, strawberries sliced lengthwise, the topping spooned on slice by slice so every piece looks fresh. Same pie she always makes. I’m just the lucky one who got to learn it from her!
What I love about it (besides, you know, all of it)? Just how little work it is. You bake off a crust, cook one quick filling on the stove, fold in a big pile of fresh berries, and let the fridge do the heavy lifting. SO easy! It’s the kind of dessert you throw together the night before a family gathering or a cookout and forget about until it’s time to slice.
It still tastes like every summer I can remember. Bright, fruity, a little nostalgic, and just sweet enough. Trust me on this one!
Hope this becomes your new favorite!
What Makes or Breaks this Pie
I really want you to nail it on the first try! After making this with my mom as many times as I have, I can tell you the two things that genuinely make or break it: dissolving the Jello all the way, and giving it a real, cold chill. Do those two steps and it slices like a dream. Skip them and it slides around the plate. Everything else is wonderfully forgiving.
Note on the pie pan! I made this exact version in a deep-dish pan, so a standard 9-inch pan needs about half the filling. See the pan-size section and recipe notes below before you start, so nobody ends up with overflow!
Why You Will Love This Recipe
- An Easy Stovetop Filling! No fussy custards, no finicky steps. One pan on the stove, then the fridge does the rest. SO easy!
- It Actually Sets! Between the gelatin and the cornstarch, this filling slices clean every time. No sad, soupy puddle on the plate. Promise!
- Make It Ahead! It chills hands-off in the fridge, which makes it a total dream for cookouts, potlucks, and lazy summer parties.
- Loaded With Fresh Summer Berries! Ripe strawberries and blueberries piled high, right at their peak. Don’t sleep on summer berries!
- A Real Crowd-Pleaser! Bright, fruity, and just sweet enough. There’s never, ever a slice left over.
What’s the Difference Between This Fresh Summer Berry Pie and a Baked Berry Pie?
Great question, and it changes everything about how this pie tastes!
A traditional baked berry pie bakes the fruit right in the crust, so the filling cooks down soft and jammy and the berries lose their fresh shape. Warm, rich, a little rustic. Lovely in its own way!
This pie keeps the fruit out of the oven. You make a quick no-cook filling on the stovetop, set it with gelatin and a touch of cornstarch, and fold in fresh berries so they stay bright, whole, and summery. The only oven step here is baking the crust.
So the real difference is the filling. Baked is warm and saucy with cooked-down fruit. This one is cool, sliceable, and bursting with fresh berries. On a hot summer afternoon? Cool and fresh wins every time. It’s exactly the version we reach for all season long.
Why Gelatin Is the Secret to This Pie
Quick science moment, because it’s actually kind of cool! Gelatin is a protein that grabs onto liquid as it chills and locks everything into a firm, sliceable set. That’s why two little things matter so much here: dissolving the Jello completely, and giving the pie a good cold chill. Fun fact for the curious, a few fresh fruits like pineapple and kiwi have an enzyme that keeps gelatin from setting at all. Every berry, though, is totally safe. You’re in the clear!
Which Pie Pan? (Read this First!)
Quick but important one! I made this version in a deep-dish 9-inch pie pan, so the amounts are sized for that deeper pan. If yours is a standard 9-inch pan (the shallower, more common kind), you’ll end up with way too much filling.
Easy fix: halve everything except the crust and the Cool Whip! You still want one full Pillsbury crust (same diameter, just less deep) and plenty of whipped topping for the slices. Everything else (the berries, Jello, sugar, water, and cornstarch) gets cut in half.
Even easier? Hit the 1/2 button in the recipe card below and it does the math for you. Just remember to keep one full crust and dollop on as much Cool Whip as you like, since those two don’t need halving.
Not sure which pan you’ve got? The photo below shows both side by side with their dimensions, so you can eyeball yours in a second!
(add photo of both pans)
Key Ingredients
Here’s what makes this pie amazing! (Full amounts in the recipe card below.)
- Fresh Strawberries and Blueberries. The flavor superstars! Sweet-tart, juicy, and they make the prettiest filling you’ve ever seen. Use them ripe and in season if you can.
- Strawberry Jello. The quiet workhorse. It sets the whole thing into clean, sliceable wedges and doubles down on all that berry flavor.
- Cornstarch. The sleeper hit! A quick cooked filling gives the pie real body, so it holds its shape instead of running all over the plate.
- Sugar. Just enough to round out the tartness of the berries without tipping into too-sweet territory.
- Cool Whip. The cloud on top! Light, airy, and the perfect cool finish against all that fruit.
- Pillsbury Pie Crust. The flaky, golden base. Store-bought keeps it SO easy (homemade if you’re feeling it!).
Pin this now to find it later
Pin ItHow to Make Strawberry and Blueberry Pie
Want the short version of how to make a strawberry and blueberry pie this easy? It’s a simple sequence! You bake and cool a Pillsbury pie crust, cook a quick filling of water, sugar, and cornstarch on the stove until it’s thick and glossy, stir in strawberry Jello until it fully dissolves, and let it cool for a few minutes before folding in your fresh berries. Pour it all into the cooled crust, let the fridge do the work, then slice and add a dollop of Cool Whip to each piece as you serve. That’s it! Scroll to the recipe card below for every exact amount and timing note.
Tips for Making This Pie
Pick Your Pie Pan. Check out the notes above, Which Pie Pan? (Read this First!), about the difference between a deep dish pie pan and a regular pie pan. This will determine the servings of your ingredients!
Bake The Crust Until Just Golden. Bake until light golden brown and let it cool completely before filling, so it stays crisp instead of going soft underneath. Consider using the Norpro Pie Crust Shield to avoid overcooking the pie edges.
Dot The Crust With A Fork. Press lots of fork indents into the crust before baking, especially where the bottom curves up the sides. It keeps the crust from puffing up. SO important!
Pat Your Berries Dry. Rinse your fresh berries and pat them dry before they go in, so no extra water dilutes the filling. Or! Go one step further and spread them out in the fridge for about an hour after patting, to dry them even more. The drier the berries, the cleaner the set! (Using frozen instead? Thaw, drain well, and pat dry.)
Make The Filling Smooth First. Whisk the cornstarch into a little cold water before it ever hits the heat. Easiest way to dodge lumps!
Regular Jello For The Firmest Slice. Sugar-free works great and keeps things lighter. It just sets a touch softer.
Dissolve The Jello Completely. Stir it into the hot filling until you can’t see a single granule. Undissolved Jello is the number one reason a pie won’t set. Trust me on this one!
Don’t Skip The Cool-Down. Let the filling cool for about 15 minutes before it meets the berries. Too hot and it’ll cook your fresh fruit. Ugh.
Chill It Long Enough. At least 2 hours in the fridge, longer if you have time. This pie sets in the fridge, so that cold time is doing real work!
Summer Berry Pie Recipe
Equipment
- 9-inch deep-dish pie plate (see the pan-size note above)
- Rolling Pin
- Parchment Paper
- Medium saucepan
- Whisk
- Rubber spatula
- Large Mixing Bowl
- Cooling rack
- Measuring cups and spoons
- Norpro Pie Crust Shield (optional, keeps the crust edges from over-browning)
Ingredients
CRUST
- 1 Pillsbury Pie Crust dough
FILLING
- 4 c. Fresh Strawberries
- 2 c. Fresh Blueberries
- 6 oz. Strawberry Jello (two 3 oz. packages)
- ½ c. Sugar
- 2 ½ c. Water
- 5 tbsp. Cornstarch
TOPPING
- 8 oz. Cool Whip (thawed)
Save this recipe!
Instructions
Prep The Crust
- Place the crust on a piece of parchment paper and, using a rolling pin, roll the dough out about 1 inch larger in diameter. Lay it over the pie plate so the edges of the dough reach the rim. Gently press the dough down into the plate until it meets all the inside edges of the dish. Using a fork, press plenty of indents into the crust, especially in the curve where the bottom meets the sides, which keeps it from puffing up as it bakes. Then gently press the edge of the crust against the rim of the dish, pressing down any overlapped areas.
Bake The Crust
- Bake at 450 degrees for about 10 minutes, or according to the package directions, until light golden brown. Remove from the oven and let cool for 10 minutes on a cooling rack on the counter. If using the Norpro Pie Crust Shield, place it on about halfway through baking time.
Prep The Berries
- Rinse the strawberries and blueberries and pat them dry. Remove the strawberry stems and slice the strawberries lengthwise. Leave the blueberries whole.
Make It Smooth
- In a saucepan, whisk the cornstarch into a few tablespoons of the cold water until completely smooth, then whisk in the rest of the water and the sugar.
Cook The Filling
- Set the pan over medium heat and bring to a boil, stirring constantly. Boil for 1 minute, still stirring, until thick and glossy.
Add The Jello
- Turn off the heat and stir in both packages of strawberry Jello until completely dissolved. Don’t rush this, undissolved Jello is the main reason a pie won’t set.
Cool It Slightly
- Refrigerate the mixture for about 15 minutes, just until it’s warm and no longer hot, so it won’t cook the berries when you combine them.
Fold In The Berries
- Add the berries to a large bowl, pour the jello mixture over them, and gently fold together.
Fill The Crust and Chill
- Pour the berry and jello filling into the cooled crust. Refrigerate at least 2 hours, until set.
Slice And Serve
- Cut the chilled pie into individual slices, top each one with a generous dollop of Cool Whip, and serve.
Notes
- Pan Size. This recipe fills a 9-inch deep-dish pie pan. For a standard (shallower) 9-inch pan, halve everything except the crust and Cool Whip. You still need one full crust and plenty of whipped topping. (Using the 1/2 scaler above? It halves the crust and Cool Whip too, so just keep the crust at one and add as much Cool Whip as you like.)
- Using Frozen Berries. If you go with frozen, thaw them in the fridge, drain them well, and pat them dry so they don’t water down the pie.
- Crust. Bake and fully cool the Pillsbury crust before filling so it stays crisp. A homemade pastry crust or a graham cracker crust both work too (chill a graham crust instead of baking).
- For the Firmest Set. Dissolve the Jello completely and give the pie a good cold chill, at least 2 hours. Regular Jello sets firmer than sugar-free.
- Variations. Swap in blackberries or raspberries, or use mixed-berry or raspberry Jello. A squeeze of fresh lemon in the filling brightens everything. Skip fresh pineapple and kiwi, though, they keep gelatin from setting.
Nutrition
Nutrition information is automatically calculated, so should only be used as an approximation.
Frequently Asked Questions
Absolutely! The recipe is written for fresh, but frozen mixed berries work in a pinch. Thaw them fully, drain them well, and pat them dry so they don’t water down the filling.
Fresh is the way to go here, especially ripe summer strawberries and blueberries. Frozen is a totally fine backup in the off-season. Just drain and dry them really well first!
Ugh, the worst! Two usual suspects. Either the Jello didn’t fully dissolve, or the pie didn’t chill long enough. Stir the Jello until every last granule is gone, and give the pie at least 2 hours (longer is even better).
Yes! It’s a great way to lighten things up. Just know that sugar-free Jello sets a touch softer than regular, so if you want the firmest, cleanest slice, go with regular.
For sure! A homemade pastry crust is lovely, and a graham cracker crust is a great no-bake shortcut if you’d rather skip the oven. Just be sure a pastry crust is fully baked and cooled (or a graham crust well chilled) before you fill it.
Yes, don’t skip it! The cornstarch needs a real boil to thicken and do its job, and that’s a big part of why this pie holds its shape. Keep in mind that we are NOT cooking the berries.
Go for it! Blackberries and raspberries are delicious in the mix. Just steer clear of fresh pineapple and kiwi, since those keep the gelatin from setting.
Definitely! Raspberry or mixed berry are both great and play right into the fruit. Strawberry is just our classic.
Almost always wet berries, undissolved Jello, or not enough chill time. Pat those berries dry, dissolve the Jello completely, and let it set fully cold. Fix all three!
Make Ahead
This pie is a total dream for entertaining! Here’s how I get it ready ahead of time.
- Up to a day ahead. Bake and cool the crust, then keep it loosely covered at room temperature.
- A few hours ahead or the night before. Make the filling, fold in the berries, and pour it into the crust. Cover and refrigerate. It needs at least 2 hours to set, so a few hours ahead or the night before both work beautifully.
- Just before serving. Slice the chilled pie and add a dollop of Cool Whip to each piece right before it goes out.
How to Store
- In the fridge. Cover loosely and keep for up to 3 to 4 days. The crust softens a little over time, so it’s at its very best in the first day or two.
- Skip the freezer. I don’t recommend freezing this one. The gelatin weeps and the crust goes soggy once it thaws. Painful! Just make it fresh and keep it chilled.
